The instructions for the accordion album may seem difficult, but using the following photos as a guide will help.

Image 1 -- Center 5" chipboard on backside of 6" designed paper.
Image 2 -- Fold corners of 6" paper over 5" chipboard. Glue down.
Image 3 -- Fold edges of 6" square over the 5" chipboard. Glue down. (It's sort of like wrapping a present.)
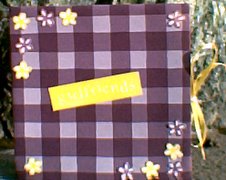
Image 4 -- Flip wrapped chipboard over, you should have a 5" square.
Repeat Images 1-4 with second 5" and 6" squares.
Images 5 and 6 -- Fold longer strip at 1" scored line. Fold over edge of shorter strip. Glue. You should now have a strip of paper 20 inches long. Fold on scored lines in an according style (when paper is set on edge, it should resemble an M).
Now comes the confusing part.
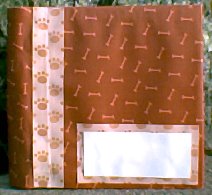
First you need to assemble the album without glue. Place the folded cardstock inside the two 5" sqares and rearrange until you have achieved the desired look. If you place the accordion one way, you will only have two pages, if you turn it around, you will have four.
Once you have placed it in the correct position (with four pages), glue.
Tie Method #1 (Wet Method)
Time to add some ties. This is a more difficult method, so if you would like something easier, refer to method #2 below.
Place some glue near the edge of one side of each cover approximately in the middle of the square. Place half the ribbon on each glue spot, so that there is enough to make a bow. (See Image 8 below) Be sure to line these ribbons up as close as possible during the next step.
Fold the accordion up and place glue on one end. Center over 5" square and glue. Cover top of accordion with glue, place second 5" square on top, lining up with the bottom square. Test the album. Open and close it to make sure you have it put together correctly.
For a more secure glue, place something heavy on top of the closed album and let dry.
Tie Method #2 (Dry Method)
The best way to put on the ties is to add eyelets after the book is assembled.
On the edge near the center of your album cover, add an eyelet in a coordinating color. Repeat on the back cover, lining up the eyelets. Run a ribbon through both eyelets and tie in a bow. (See Image 9 below)
Now your book is finished. You can decorate it however you like. 


No comments:
Post a Comment