I will be starting my father's scrapbook soon. He was in Vietnam and has a lot of photos from that time. He also has a lot of old family photos. I will be putting them into a scrapbook for him for Christmas and I will take you through each page. I will explain each step and measurement I took in creating the pages so you can recreate them at home. I will be starting within the next two weeks. Please be aware that I will only do about one or two pages every couple of weeks.
Ciao!
Saturday, January 27, 2007
Wednesday, January 24, 2007
Update
Just wanted to let you know that I am pretty busy with school right now and some new stuff at church, so it may be a little while before I can post something. I'll try on Friday when I have more time. Thanks!!
Monday, January 15, 2007
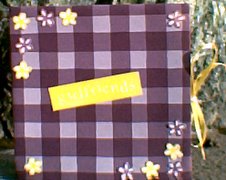
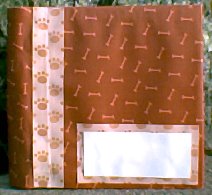
Bound notebook
The bound notebook is made exactly like the 5" accordion album with a few tweaks.
Wrap the 6" squares using the 8" decorated paper.
Glue the 5" cardstock to the 5x6" cardstocks by overlapping the scored one inch flap over the edge of the 5" square. Continue gluing cardstock together in an accordion fashion until you have reached the desired amount of pages. Allow to dry.
Glue the two 6x2" coordinating strips together, back to back, so the pattern is facing out on both sides. Dry.
Now it's time to assemble. Glue the 6x2" strip to both covers. glue 1/2 inch to the edge of the front and repeat with the back. When the two covers are closed, they should come very close to meeting. If you have one, use a Fastenator to staple the binding to the covers, adding a little embellishment. If you don't, use another coordinating strip to cover the edges of the binding.
Glue the accordion papers inside the cover, and you are finished. If you are confused, feel free to ask. Also, see the pictures over on the side under my profile.
Sunday, January 14, 2007
Update
Sorry I haven't posted the instructions for the bound book yet. I started school this week and have been busy. I will try to get the instructions posted today, but I am having company this afternoon and will not be able to get to it until later tonight. Tomorrow is a holiday so if it is not posted today, I will post tomorrow.
Friday, January 5, 2007
An extra note
Just to let you know. Directions for the bound album will be available soon.
Also, if you want me to post step by step photos of the process of making any of these albums, let me know. I do have to wait, I am out of chipboard and currently do not have the funds to buy any. Sorry. I would say about three weeks before my funding situation has changed.
Also, if you want me to post step by step photos of the process of making any of these albums, let me know. I do have to wait, I am out of chipboard and currently do not have the funds to buy any. Sorry. I would say about three weeks before my funding situation has changed.
Tuesday, January 2, 2007
Mini Accordion Album
The miniature accordion photo album is a design of my own. Although it is made exactly like the 5" album, it has been miniaturized and therefore doesn't have to be embellished much. As an added bonus, if you have made a large album, the leftover chipboard only has to be trimmed 1/2", leaving little to waste.
The directions for the mini album only differ from the larger album in one aspect. The center card stock pages do not have to be glued together, they just have to be folded in the accordion fashion. If you want more than four pages to the album, you can add on to the inside by gluing a 2.5" x11" strip to the smaller 10" strip the same way you did with the inside pages of the larger album.
Children love these albums because they can collect pictures of their friends at school and set them on their dressers at home.
Enjoy!!
Monday, January 1, 2007
Accordion Photo Album
The instructions for the accordion album may seem difficult, but using the following photos as a guide will help.

Image 1 -- Center 5" chipboard on backside of 6" designed paper.
Image 2 -- Fold corners of 6" paper over 5" chipboard. Glue down.
Image 3 -- Fold edges of 6" square over the 5" chipboard. Glue down. (It's sort of like wrapping a present.)
Image 4 -- Flip wrapped chipboard over, you should have a 5" square.
Repeat Images 1-4 with second 5" and 6" squares.
Images 5 and 6 -- Fold longer strip at 1" scored line. Fold over edge of shorter strip. Glue. You should now have a strip of paper 20 inches long. Fold on scored lines in an according style (when paper is set on edge, it should resemble an M).
Now comes the confusing part.
First you need to assemble the album without glue. Place the folded cardstock inside the two 5" sqares and rearrange until you have achieved the desired look. If you place the accordion one way, you will only have two pages, if you turn it around, you will have four.
Once you have placed it in the correct position (with four pages), glue.
Tie Method #1 (Wet Method)
Time to add some ties. This is a more difficult method, so if you would like something easier, refer to method #2 below.
Place some glue near the edge of one side of each cover approximately in the middle of the square. Place half the ribbon on each glue spot, so that there is enough to make a bow. (See Image 8 below) Be sure to line these ribbons up as close as possible during the next step.
Fold the accordion up and place glue on one end. Center over 5" square and glue. Cover top of accordion with glue, place second 5" square on top, lining up with the bottom square. Test the album. Open and close it to make sure you have it put together correctly.
For a more secure glue, place something heavy on top of the closed album and let dry.
Tie Method #2 (Dry Method)
The best way to put on the ties is to add eyelets after the book is assembled.
On the edge near the center of your album cover, add an eyelet in a coordinating color. Repeat on the back cover, lining up the eyelets. Run a ribbon through both eyelets and tie in a bow. (See Image 9 below)
Now your book is finished. You can decorate it however you like. 

Subscribe to:
Posts (Atom)


